Glamping promises comfort in nature, yet most first-timers either overpack suitcases or forget the one item that makes a dome or cabin actually comfortable. The trouble is that glamping trip packing sits awkwardly between camping and a hotel stay: you can’t rely on a housekeeping cart, but you also don’t need a full expedition kit. Get it right, and you’ll have a soft bag with exactly what you need; get it wrong, and you’ll be hauling a hard suitcase down a gravel path or shivering in a dome at night.
This checklist keeps it practical. We start with what your site actually provides, because roughly a third of budget domes and safari tents skip bedding and towels. From there, we cover clothing for a 15-20°C day-to-night swing, footwear and weather gear, toiletries for shared facilities, tech and comfort extras, and season-by-season tweaks. We finish with a quick check before you leave, so nothing essential stays on the hallway floor.
Before You Pack: Check What Your Glamping Site Provides
The single biggest packing mistake is assuming your tent comes fully equipped. Many sites provide bedding and towels, but roughly a third of budget domes and safari tents do not, so you could arrive at midnight with no pillow or duvet in sight. Before you pack a single bag, email or call the site and get a clear list of what is included: sheets, duvets or sleeping bags, pillows, bath towels, and kitchenware such as plates, cutlery and a kettle. If bedding is not provided, ask whether sleeping bags work or whether you need proper sheets and a duvet, and check the bed sizes so nothing is too small.
Heating, bathrooms and cooking
Next, ask about climate control. Not every glamping unit has heating or air conditioning, and mountain domes can sit at 5-10°C on summer nights even when the days feel warm. A dome with a small heater or wood stove is a very different proposition from one without, and it changes how warm your sleepwear and bedding need to be. If the site cannot confirm heating, plan for cold nights regardless of the season.
Bathroom arrangements matter more than you might expect. Some units have en-suite toilets and showers, while others rely on a shared washhouse that can be anywhere from 20-100 m away across grass or gravel. Knowing which setup you have helps you decide on robes, slip-on shoes and how organized your toiletry bag needs to be for a walk in the dark.
Finally, pin down the cooking setup. A full private kitchen means you can pack groceries as normal; a communal camp kitchen means bringing food in containers that seal well; and a site with no cooking facilities at all shifts you toward ready-to-eat food or nearby restaurants. Ask these four questions before you leave home, and your packing list will practically write itself.
Clothing: Dress for a 15-20°C Day-to-Night Swing
Glamping clothing is all about layers, because a day that feels warm at lunch can turn chilly by the time you sit outside your tent after dinner. Most sites see a swing of 15-20°C between daytime highs and nighttime lows, so think of your wardrobe as a modular system rather than a stack of separate outfits. The classic three-layer approach works well: a breathable base layer against your skin, an insulating mid-layer such as a fleece, and a windproof shell you pull on for evenings around the fire. You can shed or add pieces as conditions change without ever being uncomfortably cold or sweaty.
One mistake first-timers make is underestimating how cold mornings and late evenings feel, especially in alpine or northern locations. Mountain regions can see nights drop to 5-10°C even in July and August, so a warm hat and light gloves belong in your bag regardless of the season. If your trip leans toward colder conditions, it may be worth reading a winter glamping guide on what to expect and how to pack before finalizing your list.
Fabric choice matters as much as layering. Cotton absorbs dew and morning fog and can stay damp all day, and laundry rarely dries overnight in these conditions. Quick-dry synthetics or merino wool handle repeated wear far better and take up less space in your bag. If your site has lodge dinners or a resort-style restaurant, add one presentable outfit — a simple dress or a clean shirt and trousers is usually enough, since dress codes at glamping sites tend to be relaxed.
- Choose dark colors for the base and mid-layers, since tent living means clothes pick up grass stains, campfire smoke and washhouse splashes faster than at home.
- Pack a spare base layer in a ziplock bag so you always have one dry set, even if everything else has been caught in fog or drizzle.
- Bring sleepwear that doubles as an extra layer, such as a light thermal set, so cold nights cost you no additional bag space.
- Roll rather than fold your outfits — rolled quick-dry fabrics resist deep creases and fit into the odd corners of a soft duffel.
- Include a bandana or light scarf, useful for dusty trails, sun protection at noon and a little extra neck warmth after dark.
Footwear and Weather Gear
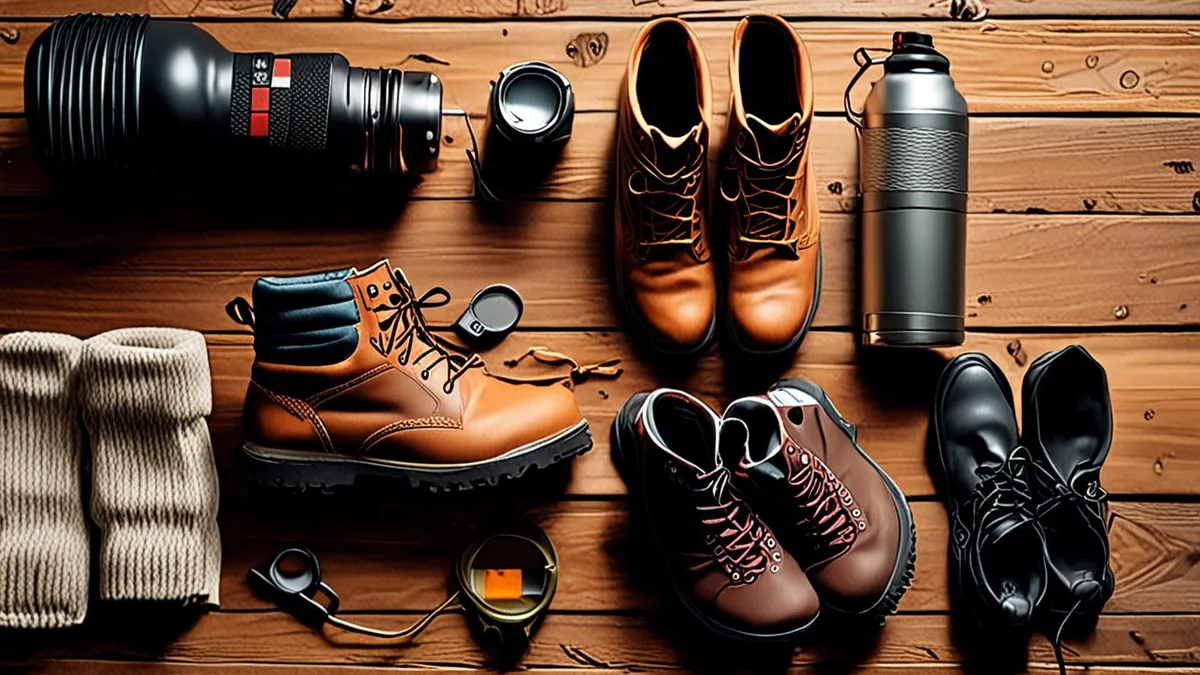
Footwear is where first-time glampers get caught out. Even if your tent feels luxurious, the walk to the washroom usually is not: showers and toilets are often 20-100 m from your tent, across grass or gravel that stays damp well into the morning. Flip-flops alone will not cut it when that path is muddy or wet with dew.
Waterproof shoes or boots are non-negotiable for this reason. You do not need heavy hiking boots unless the site advertises trails; a pair of waterproof sneakers or light boots handles most glamping paths comfortably. Break them in before you leave, because blisters on a gravel path are a miserable way to start a trip.
Inside the tent and at the showers, a second pair of footwear earns its place. Sandals or slides keep your waterproof pair dry and give your feet a break at night. Slip-on styles are best, since you will be stepping in and out of the tent doorway far more often than you expect.
Weather gear matters just as much. A compact rain jacket stows in seconds and saves you when a shower rolls in during dinner. And think about how you carry everything: a hard suitcase is a poor match for gravel paths and narrow tent doors, while a soft 40-60 L duffel can be shouldered, dragged and squeezed through tight openings. If you are still weighing up whether glamping or a classic tent trip suits you better, this comparison of glamping and camping breaks down what each demands from your packing list.
- Quick-dry socks: pack at least two extra pairs, since morning dew soaks through even waterproof shoes on long grass.
- Dry bag or rain cover: a small dry bag protects electronics and spare clothing, while a rain cover keeps the whole duffel dry if you arrive in a downpour.
- Shower sandals with grip: choose soles with texture, as shared washhouse floors get slick with soap and water.
- One plastic bag for wet footwear: keeps muddy boots separate from clean clothes on the journey home.
Toiletries and Personal Care for Shared Facilities
Even the most stylish safari tent loses its charm when you’re fumbling with a soap bottle balanced on a soaked washhouse sink at 7 a.m. Shared bathroom blocks are part of the deal at many glamping sites, and a little planning makes the experience far more pleasant. The single smartest purchase here is a hanging toiletry bag with a hook: you clip it to a door handle, a pipe or a stall divider and everything stays dry and off the wet counter.
Check your site’s eco policy before you pack your usual products. Many eco-focused sites ask guests to use biodegradable soap and shampoo, and some explicitly forbid regular products in their showers because the wastewater goes straight into the ground or a reed bed. Travel-size biodegradable versions are widely available and take up almost no space.
One more habit worth building: keep everything in your bag between uses instead of leaving it in the washhouse. Shared facilities get busy in the morning, and items left on counters tend to get moved, knocked over or forgotten. Here’s what earns its place in the bag:
- Hanging toiletry bag with a sturdy hook — look for one that opens flat so you can see everything at once, since washhouse stalls rarely have room to spread out.
- Biodegradable soap, shampoo and toothpaste — solid bars beat liquids here: no leaks, no airline limits and they last through a full week of showers.
- Microfibre towel — even when the site provides towels, a quick-dry one is handy for lake swims, wiping dew off a chair or drying your hair in damp weather, since it wrings out and dries within hours.
- Lip balm, SPF and insect repellent — these are the three items guests most often end up buying on site, usually at premium prices, so pack travel sizes rather than gambling on the site shop.
- A spare zip-lock bag — for packing up a damp bar of soap or a still-wet microfibre towel on checkout day without soaking the rest of your bag.
Tech, Lighting and Comfort Extras
Glamping sites are rarely as wired as a hotel room, and that’s part of the appeal — but it pays to prepare for it. Some domes have a single socket, others run on limited solar power that switches off overnight, and luxury tents may have full electricity but an outlet in an awkward corner. Treat your phone battery as a finite resource and bring backup.
Lighting is the other big one. If your bathroom is in a shared washhouse rather than en-suite, you’ll be walking there in the dark at some point — around 11 p.m., or again at 6 a.m. A headlamp keeps both hands free for a flashlight-free path, a gate latch or a zipper that refuses to cooperate, and it beats holding a phone torch in your teeth.
Comfort extras sound optional until the first night. Tent walls are thin, and at many sites the dawn chorus starts well before you’d choose to wake up. Birds, wind in the canvas and a neighboring family’s early start all argue for two small foam items that cost almost nothing. Round out your kit with the hiking-and-coffee essentials:
- A headlamp with a red-light mode — the dim red setting lets you get ready at night without waking your tentmate or blinding anyone on the path.
- A power bank of 10,000 mAh or more — enough to recharge a phone several times over a weekend, useful when sockets are limited or electricity cuts out after a set hour.
- Foam earplugs and a contoured eye mask — thin tent walls and early birdsong at dawn are the two most common sleep complaints, and both are solved for a few dollars.
- An insulated thermos — many sites have no in-unit kettle, so filling it the night before means hot coffee at dawn without a walk to a communal kitchen.
- A reusable water bottle and a small 15-20 L daypack — the bottle saves buying cases of water on site, and the daypack carries layers, snacks and your headlamp on half-day hikes from camp.
Season and Destination Adjustments to Your Glamping Trip Packing
The core glamping checklist stays the same year-round, but a few swaps make the difference between a comfortable trip and a shivery one. The season and the destination should reshape your bag, not rebuild it — you’re adjusting layers, sleeping gear and sun protection, not starting from scratch.
Alpine and mountain trips
Alpine sites typically run from late May to mid-October, and even summer nights up there are genuinely cold: mountain regions can drop to 5-10°C after dark in July and August. Add a heavier mid-layer — a thick fleece or a light down jacket — and pack waterproof trousers, which earn their space on wet trails and drizzly evenings outside the tent. If you’re weighing destinations, our guide to glamping in the Dolomites by area and season breaks down what to expect through the alpine season.
Hot, mild and cold-season trips
Mediterranean and coastal sites in July and August flip the priorities: sun protection comes first, so pack a wide-brimmed hat, high-SPF sunscreen and a light long-sleeve shirt for the beach-to-dinner hours. Nights stay warm, so choose lighter sleeping options — many travelers skip the insulating layer entirely and sleep in a sheet or the provided duvet cover.
Shoulder-season trips in April-May or September-October offer quieter sites and lower prices, but expect changeable weather. Book 3-4 weeks ahead rather than assuming you can decide last-minute, and add one extra insulating layer beyond what a summer trip would need — mornings can feel like a different season from afternoons.
Winter glamping is a different animal altogether. Swap the standard checklist toward thermal base layers for daytime, insulated boots that handle snow and frozen ground, and seriously warm sleepwear. Check with the site about heating in your unit before booking, because a heated dome and an unheated one are two very different winter experiences.
Final Glancing Check Before You Leave
Glamping promises comfort in nature, yet most first-timers either drag an overstuffed suitcase to a gravel path or forget the one item that makes a dome or cabin actually comfortable. The fix is simpler than it looks: everything on this checklist falls into five groups — site-provided items, layered clothing, waterproof footwear, shared-facility toiletries, and lighting plus power. Cover those groups and you are set.
Before you pack, verify bedding, towels and heating with your site, then adjust the list for the season and destination, since an alpine night and a coastal afternoon ask for very different things. If you remember only three items, make them a soft 40-60 L bag, a headlamp and a warm layer — those do the most to improve a first glamping trip. If this checklist helped you, leave a comment or share the article with a friend planning their first night under canvas.